Three minimal non-trivial Buildroot packages using Make, CMake, and Python: ttftw 2023w25
By Robert Russell
- 12 minutes read - 2512 wordsThree things from this week.
Buildroot can be a really nice fit for lots of embedded Linux applications. I’ve used it off and on over the past few years and it’s taking me a while to get an idea of what idiomatic Buildroot looks like. This week I was really happy to set up a project using Buildroot so the three things from this week will be example packages in Buildroot.
I won’t be able to explain the basics of Buildroot here. The Buildroot manual and the training class slides from Bootlin are good references for that. For even more depth Bootlin has some great training classes. I took a course with them a few years ago and it made me a lot more productive.
So let’s get into it. I’ll be building an image for a Raspberry Pi 4B target but there’s nothing too specific to that SBC here besides the configuration file. I’m working in an Ubuntu 22.04 environment running in WSL2 on Windows 111.
Since we’re building software you’re going to need some packages on your Linux build environment. Things like git and build-essential. There was a time when I tried to isolate all these in a devcontainer but that cost more effort than it saved for my cozy coding aspirations. If you aren’t worried about extra packages then here’s a starter pack that should simplify things later:
sudo apt-get update
sudo apt-get install -y asciidoc autoconf bc binutils bison build-essential \
 cpio curl dkms expect flex gawk git-core graphviz libelf-dev libiberty-dev \
 libncurses-dev libpci-dev libssl-dev libudev-dev openssl wget
Okay now let’s really get into it.
Directory structure
I’m going to suppose your top-level folder for this kind of thing is ~/code because mine is.
cd ~/code
git clone git://git.busybox.net/buildroot
Now you have a working copy of buildroot under ~/code/buildroot but we don’t need to make any edits in that directory. Instead we’re going to make a br2-external tree and add the subdirectories for later.
mkdir ~/code/demo-br2-external
cd ~/code/demo-br2-external
mkdir configs package
touch configs/.gitkeep package/.gitkeep
Note that this tree is next to the Buildroot tree. We’re going to try to leave the buildroot directory alone and only put our code, configuration, and build support stuff into the demo-br2-external tree. The .gitkeep files are a convention so that git will let you check in the directory. Once the directory has other files in it the .gitkeep file can be removed.
Finally, let’s also use the out-of-tree build option. That means all the output files from the build will be separate from ~/code/demo-br2-external and ~/code/buildroot. Let’s put it in ~/code/demo-out.
mkdir ~/code/demo-out
Here’s a preview of what the tree will look like later on, only focused on the parts that we’ll create:
~/code
 ├──buildroot/
 ├──demo-br2-external/
 │  ├──demo-br2-external.code-workspace
 │  ├──Config.in
 │  ├──external.desc
 │  ├──external.mk
 │  ├──configs
 │  │  └──.gitkeep
 │  └──package
 │     ├──bonjourabsl
 │     │  ├──bonjourabsl.cc
 │     │  ├──bonjourabsl.mk
 │     │  ├──CMakeLists.txt
 │     │  └──Config.in
 │     ├──nchello
 │     │  ├──Config.in
 │     │  ├──Makefile
 │     │  ├──nchello.c
 │     │  └──nchello.mk
 │     └──python-gammacam
 │        ├──Config.in
 │        └──python-gammacam.mk
 └──demo-out/
    ├── .config
    └── local.mk
Checking work into a local git repo needs this “one-time” setup if you haven’t done it already:
git config --global init.defaultBranch main
git config user.name "Rob Russell's BFF"
git config user.email "copy-paster@mailinator.com"
Then create your repo. Commit stuff later too.
cd ~/code/demo-br2-external
git init
Packages
Now we’re ready for the three things from this week. Let’s jump right in and make them all. Making multiple packages makes it a little more clear why you’d want to have the external build tree and what the difference is between the different package templates in Buildroot.
You don’t have to build anything yet. Just create the files and fill them in first and then we’ll build. I’m sure nothing will work the first time anyway.
If you did want to build now, the command would be
cd ~/code/demo-out
make raspberrypi4_64_defconfig O="${PWD}" BR2_EXTERNAL="${HOME}/code/demo-br2-external" -C "${HOME}/code/buildroot" menuconfig
The O=, BR2_EXTERNAL=, and -C values will be cached in mysterious ways in the br2-external and output directories so they don’t need to be given with future make commands under that directory. The next time you want to configure the system skip those parameters and run:
cd ~/code/demo-out
make menuconfig
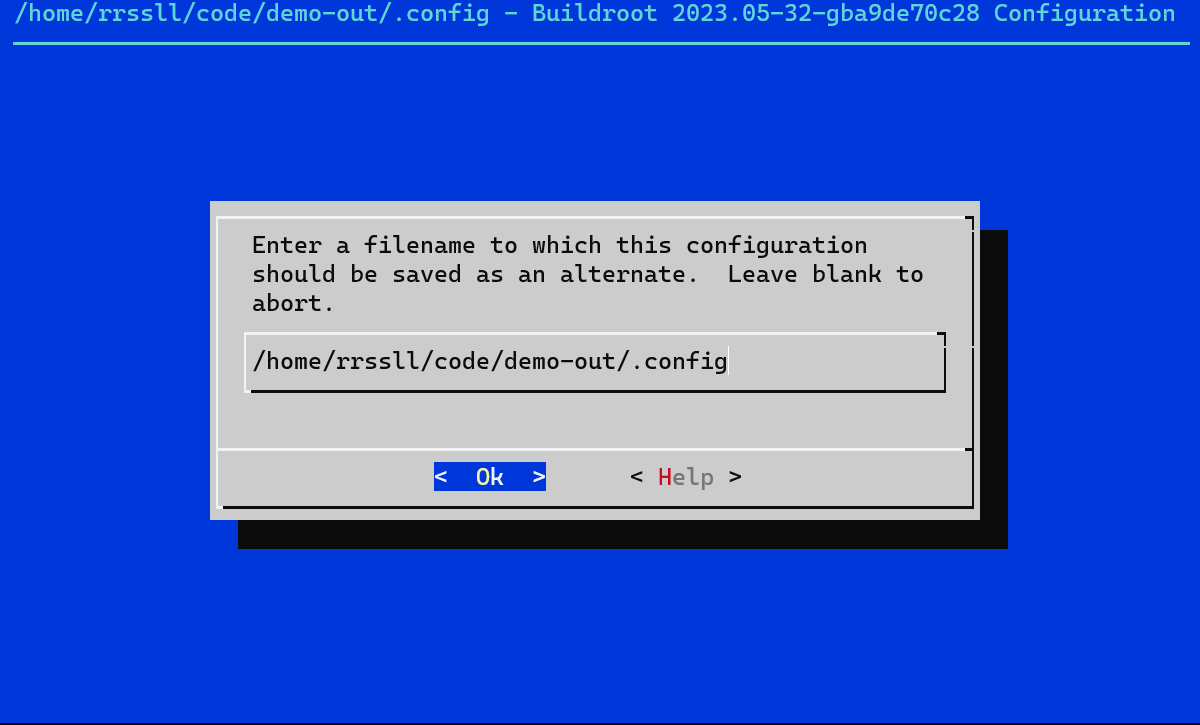
The menuconfig target brings up an UI in your terminal. It’s not super-easy to use the first time but read the text at the top. Use arrow keys to get around. Save changes to a .config in the default location (which should be ~/code/demo-out/.config). Press escape twice to exit. You’ll need to come back here later and select your new packages.
First, a generic GNU Make Package
Let’s start with a really simple C program and a Makefile to compile it. First we’ll need a Config.in and a makefile named for the package we’re created.
mkdir ~/code/demo-br2-external/package/nchello/
cd !$
touch Config.in nchello.mk nchello.c Makefile
I try not to write vanilla C anymore but it does happen sometimes. And when I do write C I’m surprised at how simple it can feel. So today I’m going to throw in the ncurses library to complicate it. This example comes from step 4 of the NCURSES Programming HOWTO. I don’t know how it works.
nchello.c
#include <ncurses.h>

int main() {
  int ch;
  initscr();
  raw();
  keypad(stdscr, TRUE);
  noecho();
  printw("Type any character to see it in bold\n");
  ch = getch();
  if(ch == KEY_F(1)) {
    printw("F1 Key pressed");
  } else {
    printw("The pressed key is ");
    attron(A_BOLD);
    printw("%c", ch);
    attroff(A_BOLD);
  }
  refresh();
  getch();
  endwin();
  return 0;
}
This Makefile explains how to compile the source and nchello.mk (below) tells Buildroot how to run it. Remember that the Buildroot Makefiles (packagename.mk) are all about building an integrated system. Packages in that system can be build with their own Makefile or some other system, as we’ll see in the other two packages.
Makefile
nchello: nchello.c
	$(CC) -o nchello nchello.c -lncurses
Next, a KConfig file which uses select to ensure that the ncurses package is chosen if this package is chosen. It supplies the ncurses library referenced with the -lncurses flag in the Makefile earlier.
Config.in
config BR2_PACKAGE_NCHELLO
    bool "nchello"
    select BR2_PACKAGE_NCURSES
    help
        Another way to say hello
Finally here’s a Makefile adapted from the Buildroot slides linked earlier. There are a couple things I’ll highlight below.
nchello.mk
NCHELLO_VERSION = 0.1
NCHELLO_SITE = "$(BR2_EXTERNAL_TTFTW_DEMO_PATH)/package/nchello"
NCHELLO_SITE_METHOD = local

NCHELLO_DEPENDENCIES = ncurses
NCHELLO_LICENSE = Apache-2.0
NCHELLO_CFLAGS = $(TARGET_CFLAGS)

define NCHELLO_BUILD_CMDS
	$(TARGET_MAKE_ENV) $(MAKE) $(TARGET_CONFIGURE_OPTS) -C $(@D)
endef

define NCHELLO_INSTALL_TARGET_CMDS
	$(INSTALL) -D $(@D)/nchello -m 0755 $(TARGET_DIR)/usr/bin/nchello
endef

$(eval $(generic-package))
$(eval $(host-generic-package))
Usually NCHELLO_SITE would point to some website hosting the source code. In this case I’m pointing into the br2-external tree for the source. I don’t think this is quite normal but I like that it keeps things compact while figuring out a new project. The variable BR2_EXTERNAL_$(NAME)_PATH is made available by Buildroot in Makefiles and Config.in using the name from external.desc (explained later on). Of course you can set NCHELLO_SITE to some other path on your filesystem. Setting NCHELLO_SITE_METHOD = local tells Buildroot that NCHELLO_SITE is a filesystem path.
The other thing I’ve done here is to set this package up to build for both the host (host-generic-package) and the target (generic-package). The host build means that you’ll have a binary that you can run at build/host-nchello-custom/nchello as well as under /usr/bin/nchello in the image built for the target system. Normally a host build target is used to create tools needed during the build.
Second, a CMake Package
Suppose you want to write C++ and you like to do it in the Google style. You’ll want to use Abseil. Buildroot has the package libabseil-cpp which will pull in Abseil for you. Let’s set up the new package directory and then fill in the files.
mkdir ~/code/demo-br2-external/package/bonjourabsl
cd !$
touch Config.in bonjourabsl.mk bonjourabsl.cc CMakeLists.txt
Let’s use the Hello World from the Abseil CMake Quickstart.
bonjourabsl.cc
#include <iostream>
#include <string>
#include <vector>
#include "absl/strings/str_join.h"

int main() {
  std::vector<std::string> v = {"foo","bar","baz"};
  std::string s = absl::StrJoin(v, "-");
  std::cout << "Joined string: " << s << "\n";
}
The provided CMakeLists.txt needed a couple tweaks and I also bumped up the C++ version to something more recent. CMake will build the executable bonjourabsl by compiling the source bonjourabsl.cc and linking it with absl::strings.
CMakeLists.txt
cmake_minimum_required(VERSION 3.5)
project(bonjourabsl CXX)
set(CMAKE_CXX_STANDARD 17)
find_package(absl REQUIRED)
add_executable(bonjourabsl bonjourabsl.cc)
target_link_libraries(bonjourabsl absl::strings)
install(TARGETS bonjourabsl)
Buildroot needs a Makefile to trigger the build via CMake and installation of the package.
bonjourabsl.mk
BONJOURABSL_VERSION = 0.1
BONJOURABSL_SITE = "$(BR2_EXTERNAL_TTFTW_DEMO_PATH)/package/bonjourabsl"
BONJOURABSL_SITE_METHOD = local
BONJOURABSL_DEPENDENCIES = libabseil-cpp
HOST_BONJOURABSL_DEPENDENCIES = host-libabseil-cpp
BONJOURABSL_CXXFLAGS = $(TARGET_CXXFLAGS)

$(eval $(cmake-package))
$(eval $(host-cmake-package))
And the a KConfig snippet will let us enable the package when running make menuconfig later.
Config.in
config BR2_PACKAGE_BONJOURABSL
    select BR2_PACKAGE_LIBABSEIL_CPP
    bool "bonjourabsl"
    help
        Salut, Abseil
Enabling this package also enables BR2_PACKAGE_LIBABSEIL_CPP which will, in turn, bring in C++ support.
The same patterns show up here as above: The package depends on BR2_PACKAGE_LIBABSEIL_CPP so it selects that package in Config.in. And once again I’m building for host and target architectures just so we can run the program at ~/code/demo-out/build/host-bonjourabsl-custom/bonjourabsl. My source is local and sits in the br2-external tree.
Third, a Python Package
Just to see what a Python package in Buildroot looks like, let’s pull the Gamma Camera Python library into our Raspberry Pi image. There’s more effort needed to make it functional for a real camera array but treat this as a starting point.
mkdir ~/code/demo-br2-external/package/gammacam
cd !$
touch Config.in python-gammacam.mk
Config.in:
config BR2_PACKAGE_GAMMACAM
    bool "gammacam"
    help
        Gamma Camera flexible camera array software.

        https://github.com/robrussell/gamma
python-gammacam.mk:
PYTHON_GAMMACAM_VERSION = HEAD
PYTHON_GAMMACAM_SITE = $(call github,robrussell,gamma,$(PYTHON_GAMMACAM_VERSION))
PYTHON_GAMMACAM_LICENSE = Apache 2.0
PYTHON_GAMMACAM_LICENSE_FILES = LICENSE
PYTHON_GAMMACAM_SETUP_TYPE = setuptools

$(eval $(python-package))
$(eval $(host-python-package))
Notice I named the Buildroot package gammacam even though my GitHub project is named gamma. The Buildroot project name has to be internally consistent but doesn’t depend on what name is on the source repo.
Python packages always start with python- in Buildroot.
Globbing the packages
I said these packages would all be part of the br2-external tree so let’s fill in the required files for that tree.
Each of the packages has a Config.in and a package.mk Makefile. This KConfig file collects them all together.
Config.in
source "$BR2_EXTERNAL_TTFTW_DEMO_PATH/package/nchello/Config.in"
source "$BR2_EXTERNAL_TTFTW_DEMO_PATH/package/bonjourabsl/Config.in"
source "$BR2_EXTERNAL_TTFTW_DEMO_PATH/package/python-gammacam/Config.in"
All the variables with TTFTW_DEMO in their names get it from the name given in external.desc.
external.desc
name: TTFTW_DEMO
desc: Three demo packages.
Building
Now that the packages exist and the br2-external config files are in place, run make menuconfig in the output directory to configure what will be built. The first run looks like this
cd ~/code/demo-out
make raspberrypi4_64_defconfig O="${PWD}" BR2_EXTERNAL="${HOME}/code/demo-br2-external" -C "${HOME}/code/buildroot" menuconfig
And when you re-run it because something didn’t work, you run it like this
make menuconfig
Select the new packages under the “External options” menu.
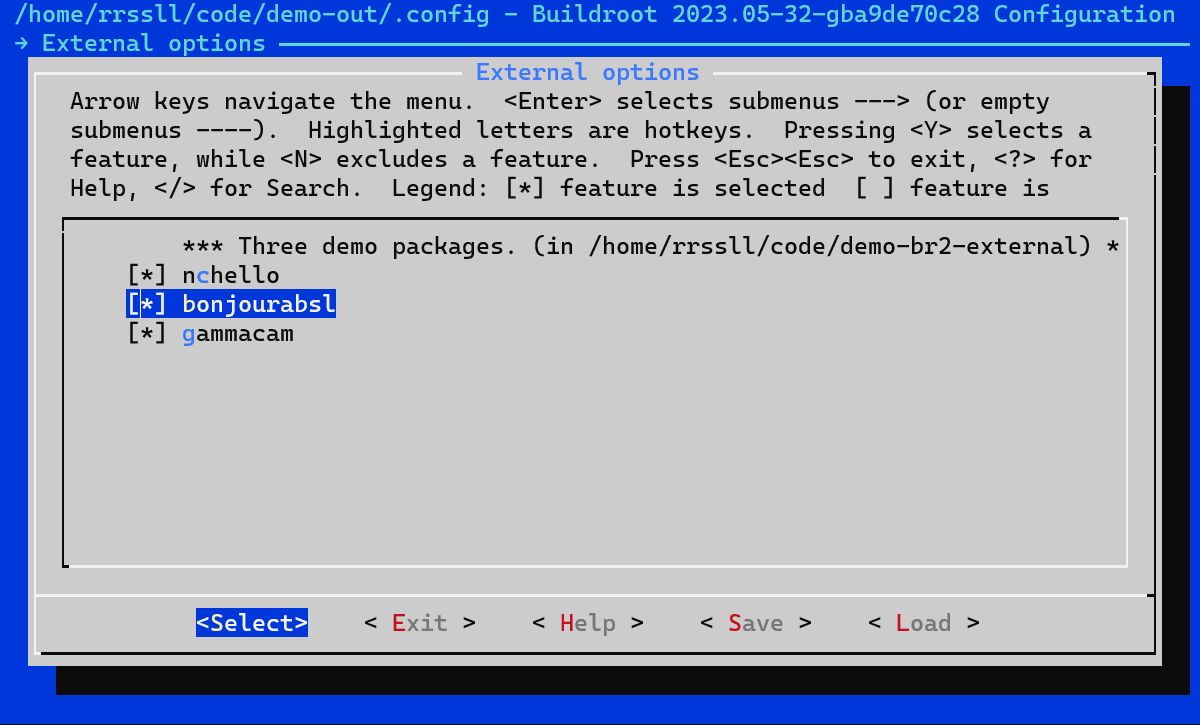
Save the .config and exit. Then run make.
make
I think the default make target is all. It will download sources for packages and tools that it needs then build everything. There are a lot of things that can go wrong here. Good luck. A fast CPU with lots of cores generally makes the actual compilation steps faster. Make sure the filesystem is on some reasonably fast drive as well without weird interface issues. On WSL2 in particular don’t put your source on the Windows side of the world under /mnt/c/ and don’t try putting it on a network share unless you’re smarter than me.
Iterative builds
Building the first time is different from building the second time. Iterative builds are important since that’s when we do the actual development work.
Buildroot is more intended for integrating complete sources than for normal development work the way I’m using it here. Setting the source location to local for our packages tells it to use the code from ~/code/demo-br2-external/package/ but it copies the code into ~/code/demo-out only when it doesn’t exist. Running make again will just recompile the source without copying changes from the source path. In order to edit, build, edit again, and build again, ad inifinitum we’ll also tell Buildroot to copy the code over from the same path when rebuilding. Create a file called local.mk in the same directory where the .config file is
cd ~/code/demo-out
touch local.mk
local.mk
NCHELLO_OVERRIDE_SRCDIR="$(BR2_EXTERNAL_TTFTW_DEMO_PATH)/package/nchello"
BONJOURABSL_OVERRIDE_SRCDIR="$(BR2_EXTERNAL_TTFTW_DEMO_PATH)/package/bonjourabsl"
PYTHON_GAMMACAM_OVERRIDE_SRCDIR="$(BR2_EXTERNAL_TTFTW_DEMO_PATH)/package/python-gammacam"
Buildroot will read this file (known as the BR2_PACKAGE_OVERRIDE_FILE) and you can see your new changes when you rebuild. Here are some example commands using the <pkgname>-rebuild pattern. You don’t need to run them all - I just want to give an idea of what some valid make targets look like.
make nchello-rebuild
make host-nchello-rebuild all
make python-gammacam-rebuild all
make host-python-gammacam-rebuild all
Clean builds
There are a variety of levels of clean when building. I won’t try to list them all but here are a couple:
make clean- deletes most output stuff but not.configor the Makefiles that keep track of your br2-external tree.make distclean- deletes your.configand forgets about your br2-external tree. You’ll need to useO=and-Cafter this and also repeat any configuration you need.rm -rf build/host-nchello*- deleting the build directory is faster thanmake host-nchello-dircleanand also catches cases where you’ve changed the package name or version.
Some common problems
If you don’t seem to have a C++ compiler then check that it’s enabled by running make menuconfig and looking at “Enable C++ support” under the “Toolchain” menu.
If it doesn’t work then make sure you ran make menuconfig and saved a .config first.
To try again from scratch you can delete everything but .config and local.mk under ~/code/demo-out or just rename that directory.
As long as your build environment works to some degree you can get some help by running
make help
And you can interrogate the Buildroot Makefile variables for your packages with targets like
make -s printvars VARS=HOST_BONJOURABSL_%
The % here should work as described under the patsubst function in the GNU make manual.
Good luck
This was another “short post” that grew way bigger than it should have been. I tested the host builds a few times but all I can say about the target build is that it compiles. Flash it to a card and let me know if it works for you.
-
WSL2 with a local filesystem is usually a nice Linux environment. There is one headache that needs to be dealt with up front though. Buildroot doesn’t like having spaces in the
PATHenvironment variable and WSL2 includes some like the cursedProgram Filesdirectory. Buildroot will complain withYour PATH contains spaces, TABs, and/or newline (\n) characters. This doesn't work. Fix you PATH.Spaces in file paths are valid if they’re escaped properly but there’s no way to argue with an error message. One way to resolve it is to skip adding the Windows paths to the bash path in WSL by adding this to
/etc/wsl.conf(and then restarting WSL2).[interop] appendWindowsPath=falseUnfortunately this means VS Code isn’t in your path anymore. In a shell where you want to run it with
code .you can add it back manually:export PATH=${PATH}:"/mnt/c/Users/${USER}/AppData/Local/Programs/Microsoft VS Code/bin"It’s probably better, long-term, to make a wrapper function or alias for the
codecommand. ↩︎